

Having built myself some wonderful 2.5 floor standers to Troels Gravesen designs with Seas drivers I was interested to hear views from him about pairing subs with these. I explored the idea with Troels who has now released a fantastic looking 3 way with an integrated sub and he was of the opinion that there would be benefit.

I had built a single sub for the surround system already, so set about building a second and upgrading it/them with the Hypex amps. I chose the matching Seas sub and passive radiator to match the floor standers.
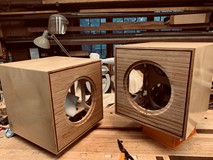
The cabinets are 400mm cubes built from birch ply. I have done an exposed edge front to the other speakers with purple heart highlights and followed that these with these. That involves laminating up the ply to give the exposed edge effect. Quite a common thing now I find on youtube !
This then gets a sand , made quicker and flatter with a drum sander.
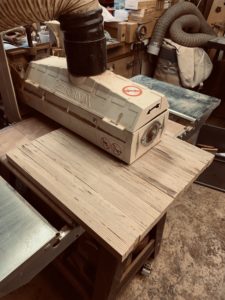
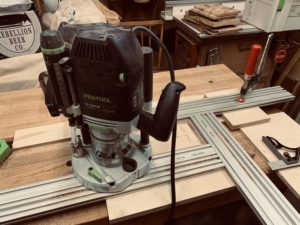
The cabinet sides and top are mitred and I find the best way to keep it all together whilst clamping is with the Festool Domino
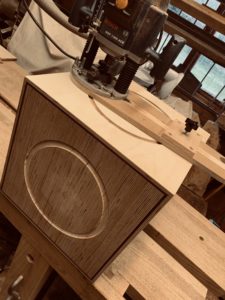
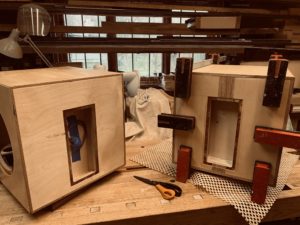
The front is then routed to take the purpleheart and the rest of the carcass routed to inset the front and back panels I tend to glue the front of the cabinet in before routing the driver recess. there is a risk there but providing you make a test cut before committing you should be all right. Remembering to back the cut so you get nice clean guts on the inside, I also find that if you apply some finish beforehand the face cut is better with less splintering
I then set about making the internal bracing as it is easier to set this out when you have the driver in place. The Seas has a massive magnet so that you use to space your braces.
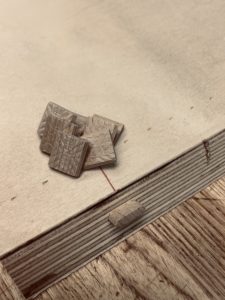
With at done its time to rout some more holes. I worked on the basis of getting as much cut out with out weakening it all too much. You can then glue it all in place.
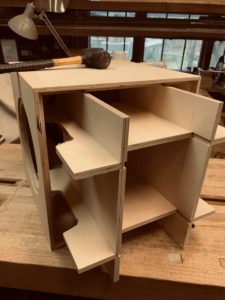

You will see I have added some felt to reduce reverberation and hopefully to increase the effective volume a bit.
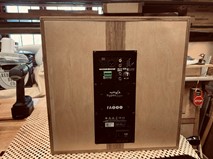
Then on to the back and the recess for the Hypex. Once its all fitting then its time to glue it all together
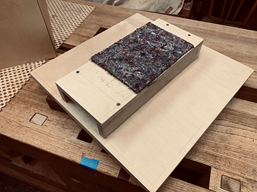
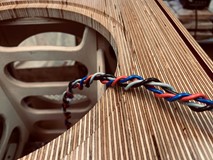
Here are the completed cabinets. Hypex recommend braiding the speaker wires so clamp the wires and and get out the electric drill and slowly braid them all together. Fit the Hypex and remember to silicone the hole between the driver and the amp compartment. I had finished them before fitting the hardware with Epifanes varnish thinned with their own brand thinner. Rubbed on a bit like french polishing with about 10 coats
I have yet to play with the Hypex configuration much but with around an 80Hz crossover point you notice a defined, very pleasing deepening of bass but without drawing attention to the fact. Not the big slam shaking you expect from a cinema experience. If you see what I mean. So much more playing needs to be had with the settings but a well worthwhile tweak to the whole setup. Even in my very compromised listening room.


Resources below
Troels’ Project this build is based upon is here
Hypex plate amplifiers can be found here